Raspberry Pi
Web, File and Print Server
My ASUS router blew up after 60 glorious days of service. I had a 90GB SSD and a laser printer hanging off of it. It was an emergency, so I ran out and bought another router - a Netgear R8500. The printing functions work perfectly from my Mac, but the rest of the family could generally only print one time per router boot. Same OS as mine. I messed with it for days, then sought the help of a printer server. The cheap ones don't seem to work, and the expensive ones are just like them only they cost more.
I could put the printer on my Linux box, which always works, but that thing makes a too much noise to leave running 24x7. An alternative is the Raspberry Pi, a little Linux board cheap enough for single-purpose use, and I had been waiting for a good application so I could try one out. This was it.
The whole project involves putting up a web server with a custom page, hooking up a printer and getting other PCs to print on it, and setting up a Samba shared disk so you can either save or share data from other machines.
Hardware
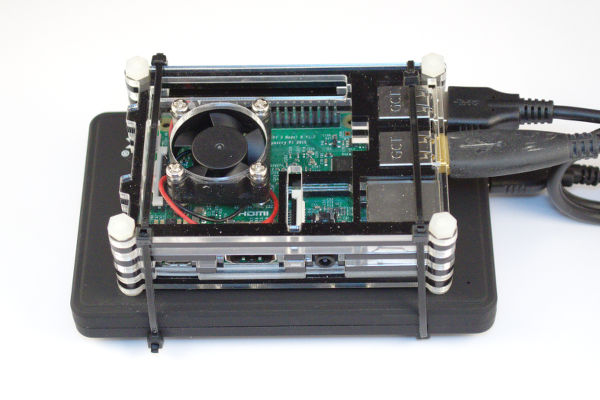
It looks like it's just a Raspberry Pi, but that's because it is just a Raspberry Pi. There were no other boards or circuits required. Altogether, the RPi 3B, a microSD card, and the RPi power supply were all that was needed. I did put it in a case. I wasn't sure if it would get hot or not, so I ordered a case with a fan. The 90GB SSD is in a plastic USB to SATA external enclosure.
Configuration looks difficult, but it only took about 30 minutes from start to finish. It took longer to assemble the case. It sits behind the printer, with a 1 foot USB cable to the printer.
Web Server Setup
(Click to open)Web Server Software
You can't really go wrong with Apache. To install it, run the following command.
sudo apt-get install apache2
Then go to a PC, load your favorite browser, and type in:
http://raspberrypi.local/
You should get the "Apache2 Debian Default Page", wihch doubles as a bit of documentation on how the web server directories are set up. For now, the important one is "/var/www/html", which is where the document you are reading is located. It is named "index.html".
If you would like a page of your own, you can go to "/var/www/html" and type:
sudo nano mypage.html
To give it something to show, copy and paste the following into the editor and save the file.
        My Page

            This is my Raspberry Pi page.
Now, back to your browser and type in:
http://raspberrypi.local/mypage.html
You should get a page that pretty much says it is your page.
Print Server Setup
(Click to open)Printer Software
I started with a full install of Raspbian on a 16GB microSD card. Then CUPS (Common Unix Printing System) was added to control the printer. There is a good article on installing CUPS.
sudo apt-get install cups
Put the pi user in the line printer admins group:
sudo usermod -a -G lpadmin pi
Then edit the cups configuration file:
sudo nano /etc/cups/cupsd.conf
Find and comment the line that causes CUPS to listen for connections only from this host:
# Listen localhost:631
CUPS has to listen for connections on port 631 on all interfaces, so add this line:
Port 631
Then in "Location /", which looks like this:
Order allow,deny
change it to look like this:
      Order allow,deny
      Allow @local
And under "Location /admin"...
Order allow,deny
change it to look like this:
      Order allow,deny
      Allow @local
And under "Location /admin/conf"...
      AuthType Default
      Require user @SYSTEM
      Order allow,deny
change it to look like this:
      AuthType Default
      Require user @SYSTEM
      Order allow,deny
      Allow @local
Then restart CUPS:
sudo /etc/init.d/cups restart

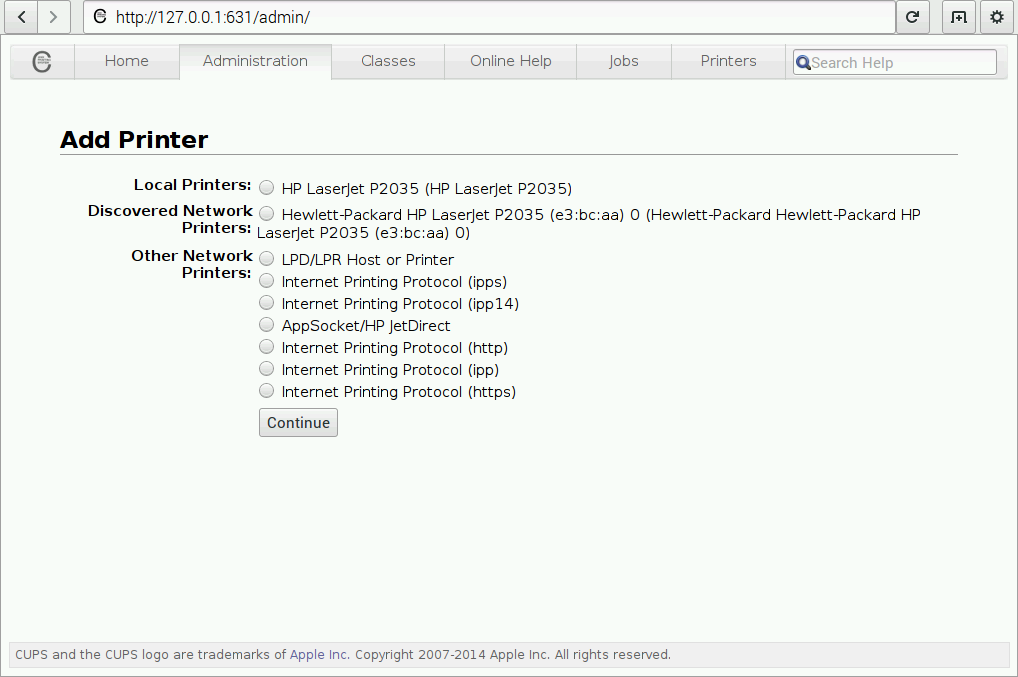
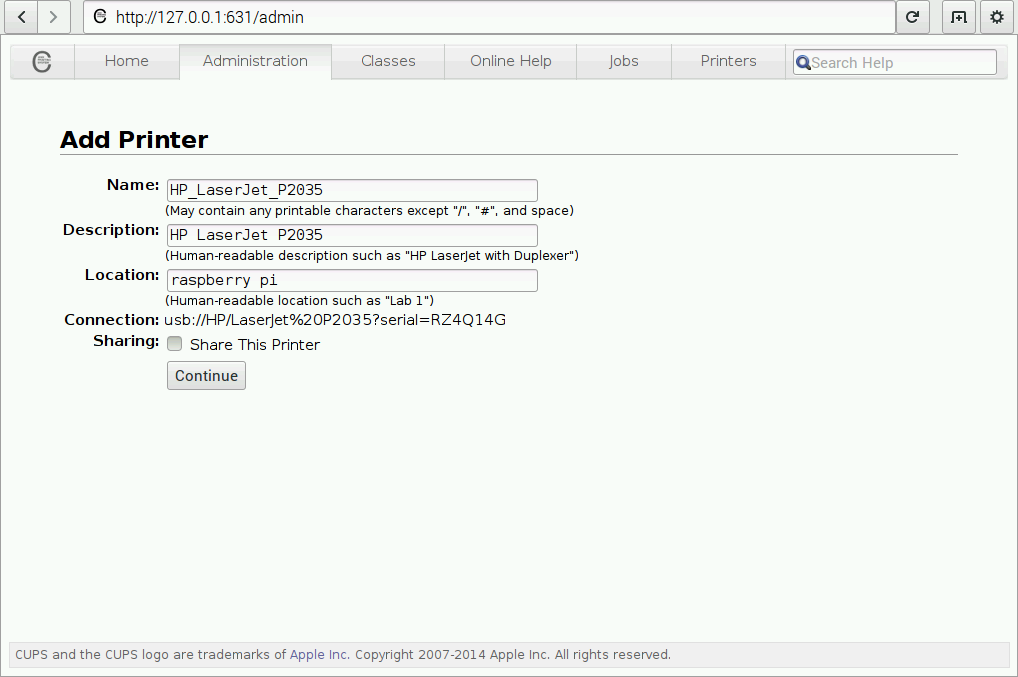


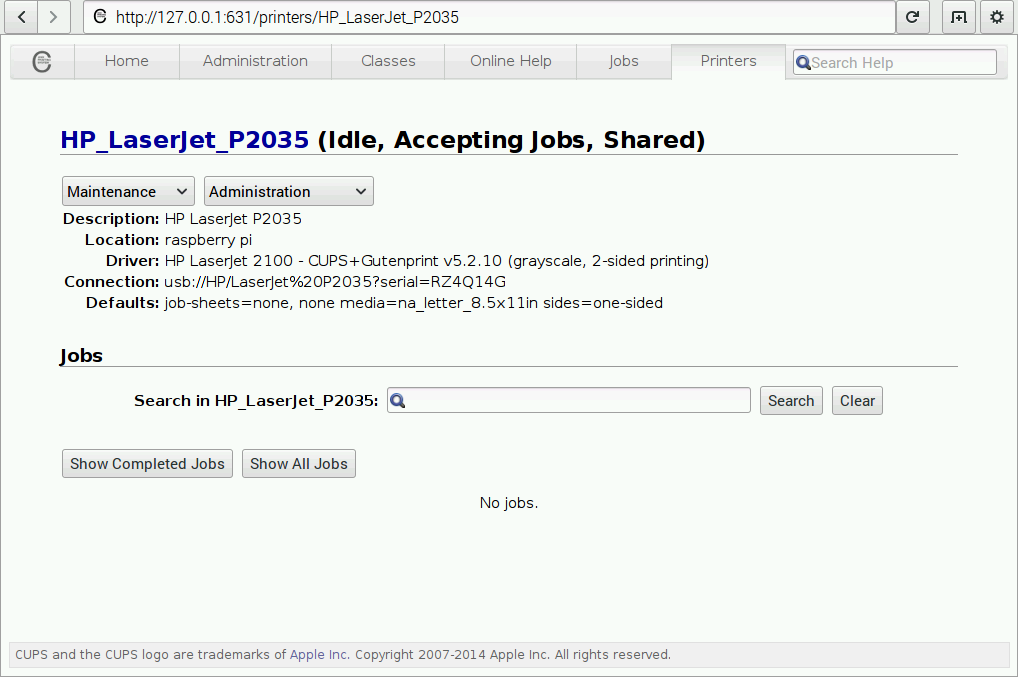
You can test the printer by adding it to your installed printers on your PC. If you are using a Windows PC, you will probably need to install Bonjour to locate and install the printer.
File Server Setup
(Click to open)SSD
The SSD is an old Corsair 90GB I had in a Mac Mini for a while. 90GB is a good size and fairly low power, so it will run off of the Raspberry Pi USB power. You don't need to use an SSD - any USB external drive will work,as long as it doesn't require more power than the Pi can deliver. The drive needed to be mounted in fstab and then shared in Samba.
Drive Configuration
First, the drive needed to be formatted and mounted. Formatting is simple if you first find out where your drive is located in /dev. To do that you run fdisk:
sudo fdisk -l | grep "^Disk /dev"
Which will show you the drives attached to the RPi. To format, find the correct drive from the list (in most cases the SD card is /dev/mmcblk0, and the USB drive is /dev/sda), and assuming your drive is "dev/sda", run the following command:
sudo mkfs.ext3 /dev/sda1
Make a directory in the /media directory, then mount the drive on that directory.
sudo mkdir /media/xfer
sudo mount -t auto /dev/sda1 /media/xfer
The mount will go away when the Pi restarts. To make it permanent, edit the fstab and add the mount. The syntax is a little different than that above.
sudo nano /etc/fstab
The finished fstab on my Pi looks like this:
    proc            /proc           proc    defaults          0       0
    /dev/mmcblk0p1  /boot           vfat    defaults          0       2
    /dev/mmcblk0p2  /               ext4    defaults,noatime  0       1

    /dev/sda1       /xfer           ext3    defaults          1       2

    # a swapfile is not a swap partition, no line here
    #   use  dphys-swapfile swap[on|off]  for that
Where the 4th line is the SSD.
Samba Configuration
Samba is the software that allows you to share a linux folder with Windows and Mac PCs. It is installed using apt-get.
sudo apt-get-install samba samba-common-bin
Then we set the permissions on the directory we are going to share, which is the directory our 90GB SSD is mounted on.
sudo chmod 01777 /xfer
The Samba configuration file is intimidating, but that is because of all of the comments, documentation, and pesky warnings. We are going to strip that out. I found this at The Urban Penguin First, rename the original file to save it in case you hose the edit.
sudo mv /etc/samba/smb.conf /etc/samba/smb.conf.org
Then use grep to filter out the comments.
grep -ve ^# -ve ‘^;’ -ve ^$ /etc/samba/smb.conf.org > /etc/samba/smb.conf
The resulting file is very clean. The only edit is to add this to the very end:
[data]
   comment = Data share
   path = /xfer
   browsable = yes
   read only = no
Then restart Samba.
service smbd restart
User Configuration
Now we need to add the users who will be accessing the share. They must be regular linux users, so we have to add them to linux first.
sudo adduser mlamb
It will ask a lot of questions. Then, we add the user to Samba.
sudo smbpasswd -a mlamb
Testing
You should be able to go to any PC (Mac, Linux, Windows) on the local subnet and connect to smb://raspberrypi.local/ and usually, the PC will discover the share without you having to specifically connect. You will see two directories. One is your username, and that is on the microSD card, so keep the amount of data to a minimum. The other is the shared data directory, on the external drive. In my case that is 90GB.
Finally
It has been running for a week with no problems. Although the services are available within 30 seconds of a boot, it wants to run fsck on the drive every time you power off without shutting down. There is a delay of about 1 additional minute before the services are available on that particular boot. Don't power off without shutting down if you can help it. ssh into the Rasbperry Pi and do a shutdown before powering off.
sudo shutdown -h now