Fast Half-Blind Dovetail Joints
Definition
A half-blind dovetail joint is an interlocking joint that is only half visible. Only the end of the pin board and and the side of the tails can be seen. A full or through dovetail has the end and one side of both boards visible. A blind dovetail is completely hidden, and looks from the outside like a miter joint.
The half-blind dovetail finds practical use in drawers, where the sides are joined to the front. The joint is held together by interlocking in one direction, so pulling the drawer out will not leave you with just the handle and drawer front in your hand. The sides of the drawer are typically constrained enough that the joint can't open up sideways, so the result is an essentially fully interlocking joint.
This joint is possibly responsible for the evolution from shelves to drawers in the 1600's.
Summary
This article describes a method of making half-blind dovetails that is easy and fast. I read about this in a magazine years ago, lost the magazine, found them online, downloaded the pdf of the article, lost that, and now an internet search no longer produces the pdf file. So I decided to actually try it. It worked. The very first time I got a usable, but not too pretty, half-blind dovetail joint.
UPDATE: I just found it in a Popular Woodworking article by Troy Sexton. It is interesting to note that this article has been published several times. On the Popular Woodworking website, the article is 2007, and is called "The $19.99 Dovetail Jig", but I found a version from a pdf of the compete Essential Guide to Routers (January 2008) that is titled "The $22.00 Dovetail Jig" and has more pictures. I won't supply a link to that, since it is likely pirated, but it is available on the Popular Woodworking website.
Using a router with a standard dovetail bit and guide bushing, along with a simple easy to make template, one can very quickly create dovetails of any proportion and spacing desired. The only handwork is cutting the tails, which have straight lines, and paring a little bit off one face of each tail.
Build
To lay out your dovetail...
- Cut a piece of 1/4" hardwood the width of your drawer front (or whatever piece has the pins).
- Put one or more slots in the end of the template the size of your tails.
- Chuck up a 1/2" major diameter, 14° dovetail bit in the router with a 1/2" O.D. template bushing.
- Set the bit to the proper depth of cut.
- Run the router around the inside of the template cutout.
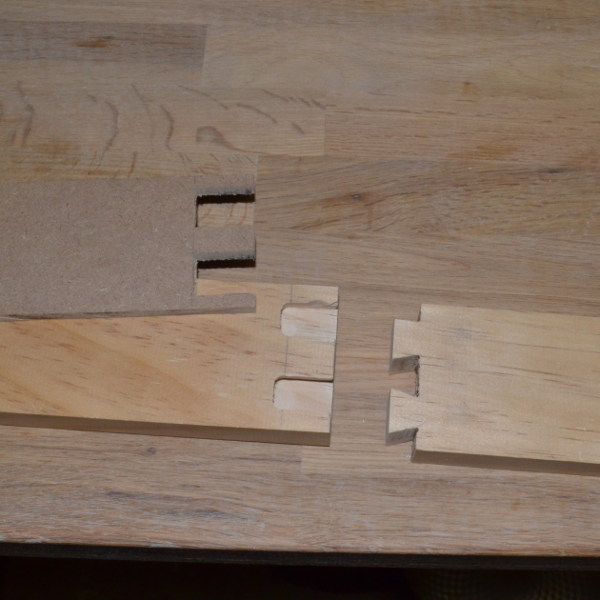
That will cut the pins. In the article, the author said "the hard part is done" or something very similar. He was right.
To do the tails, you hold the end of the tail board at a 90° angle to the pin board, with the end exactly at the depth of cut of the router, and trace the outline of the routed pocket(s) onto the tail board. When you are done, cut the waste from between the tails, by cutting along the waste side of the line. Now the tails are sized, but they won't seat completely. Here is where I deviated from the article.
In the article, the author cut the pins (or the sockets between them) longer than I did. He cut them so that the tails will fit in with no trimming. That leaves holes in the back of the drawer front that are just visible. The socket for the tails has a 14° slope on three sides. The tail just cut has a 14° angle on two sides. You need to add a 14° bevel on the tail so it matches the pocket in the pin board. This hides the routed sockets completely.
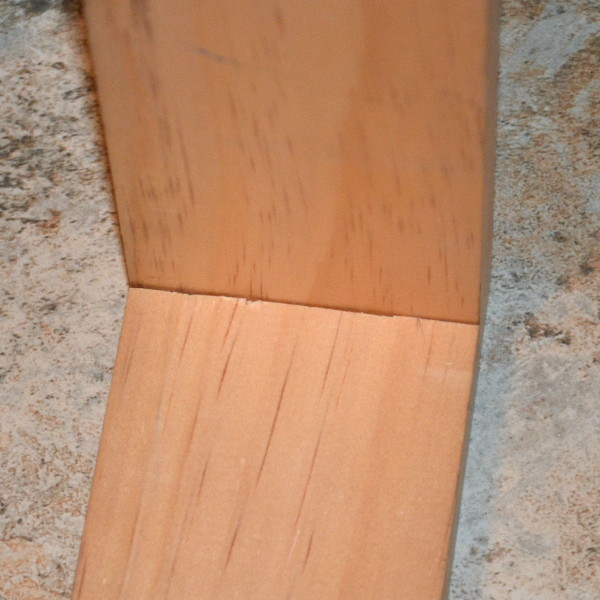
To do that, I used a razor saw to cut along the shoulder to the correct depth (about 1/8" on my example) and then chiseled the tail to fit into the socket. This means that if you use a guide bushing the same O.D. as your router bit at it's widest, you will need to cut the template depth to the thickness of the tail board. An alternative is to cut the round ends of the sockets on the pin board square with a knife or chisel.
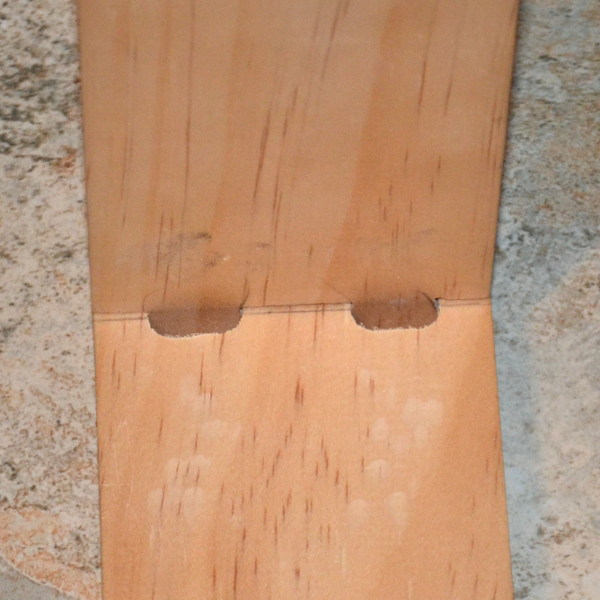
These images show the difference between the two methods. Figure 2 shows the way they were done in the article. The visible holes are exaggerated by the fact that I cut the socket about 1/8" too far in. You can see that the tails can't fill the sockets without trimming something.
Figure 3 shows the way it looks if you only cut in the thickness of the board, and then chisel the tail to match.
I'm sure it works both ways, because I've tried both. Both give you a very tight joint - One just looks a little better on the inside.
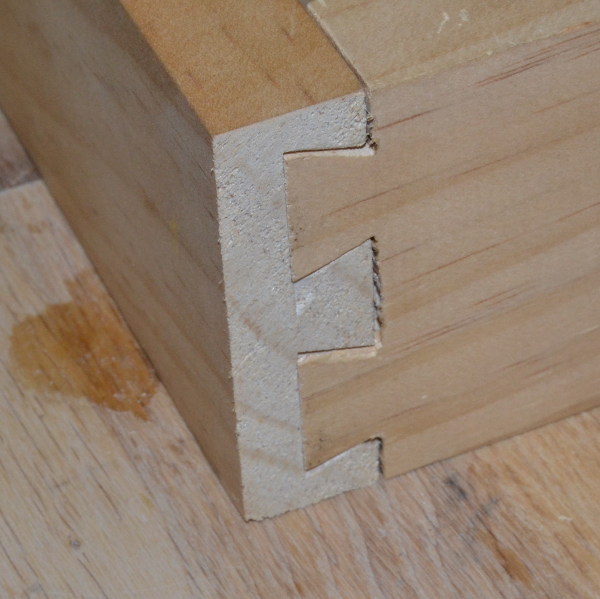
Here is the result. Not a terrific dovetail joint, until you consider that it is my first time using a router template, router guide bushings, and my first attempt at a dovetail joint! It took 33 minutes to decide how I wanted to do it, layout and cut the template, cut the pins and tails, and run around the house hollering about the result.
Mileage may vary, but with the template made, it took me about 5 minutes to do a second dovetail from start to finish. If you tool up, and do all the pin boards, then do the tail boards one at a time, you could do these things very quickly. I still have to learn how to properly remove the material between the tails, though. The only non-contact points on the joint are the shoulders between and beside the tails. I consistently cut them too deep.
Another thing to be aware of is the rigidity of the template. My 1/4" MDF is about as rigid as a sheet of paper, and flexes when the guide collar presses against it. Solid wood, as shown in the article, would be much better. You can see a gouge in the top image from the template flex.
I used the Woodcraft guide collar set the author mentioned. The depth of these collars is a tiny bit less than 1/4" because of the inset in the router base I'm using, so the 1/4" thick template material worked fine. The actual collar is a smidge longer than 1/4". Being brass they should be easy to file down a little.
I can't begin to tell you how much this is not my idea. I had nothing to do with it. I just read it, remembered it, tried it out, and documented it. I am amazed at how easy it was.