Stepper Motor Basics
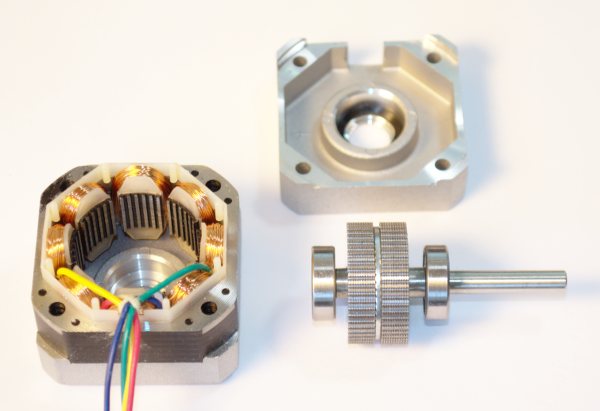
Stepper motors are similar to synchronous AC motors, or brushless DC motors. The rotor is magnetized and the stator is four pairs of electromagnets. The motor is controlled by driving current through those electromagnets, which forces the rotor to turn to align with them. Where the rotor on a brushless motor may have four poles, the rotor of the stepper motor has dozens of poles. The many closely spaced poles allow the controller to move the motor a fraction of a revolution and stop.
The wiring of a stepper motor can be 4 to 8 lead. The connections vary based on whether the motor is wired to use bipolar or unipolar drive. Bipolar drive means the voltage on two ends of the coil are first one way, and then reversed. This is generally more efficient than unipolar drive, where one end of the coil is held high and the other end is brought low to energize the coil. Bipolar motors will have 4 or 8 leads. Unipolar will have 5 or 6 leads.
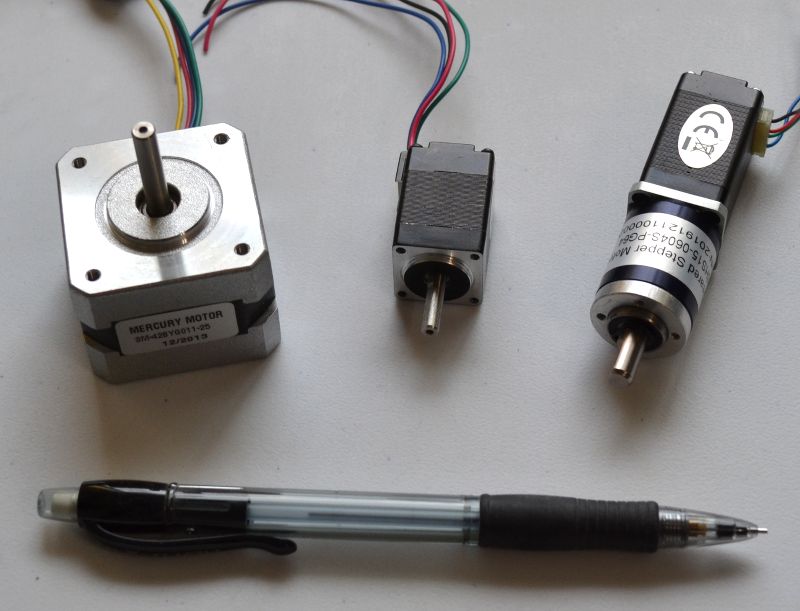
The larger stepper motor is a Mercury Motion NEMA-17 bipolar stepper SM-42BYG011-25. It has 200 steps per revolution (1.8° per step) and a DC resistance of 33Ω per coil. It came from Sparkfun. The data sheet is linked to on the product page. It is about the largest motor I would try to run without a dedicated power supply just for the motor.
The smallest of the three is a NEMA-8 stepper from Pololu.com. Also bipolar and also 200 steps per revolution. Finally, a motor I have used in a project, the 8HS15-0604S-PG64 NEMA-8 64:1 geared stepper from OMC-onlinestepper.com. Both of the smaller motors are lower voltage, but require 0.6A per coil. The Pololu motor has 1/2 the torque of the StepperOnline motor before the gearbox, and 1/128 after the gearbox. The StepperOnline motor has a final 12,800 steps per revolution.
The Driver
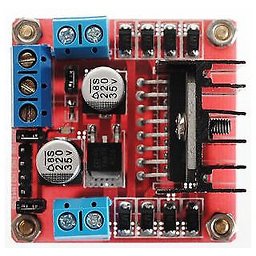
The Arduino can't supply enough current or voltage to directly drive one of these stepper motors. For that an external driver is required. These L298N driver boards will drive one stepper motor per board. Four Arduino digital outputs are required to drive a single motor.
This driver has an L298N motor driver IC, a 5V regulator, and protection diodes. All high-current connections are screw terminals. Signal level connections are header posts.
Arduino Stepper Tutorial Schematic
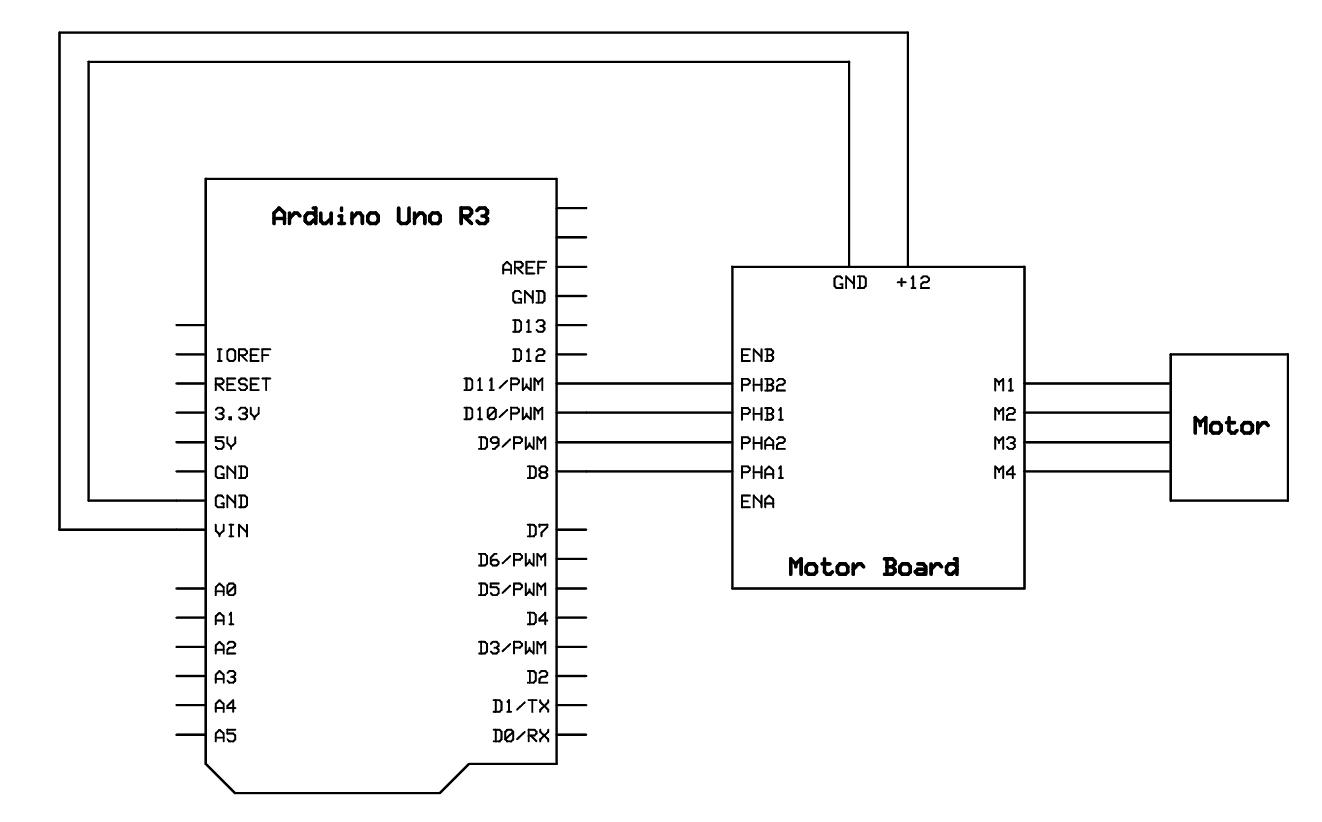
There are only three parts to this circuit - Arduino Uno, driver, and stepper motor. The wiring should be 26 gauge or larger on the 12V and ground lines. The driver inputs are just 5V signal level. You must provide an external 12V power supply, plugged into the Arduino power jack. If the motor is too large, you will need to run the 12V directly to the driver board, and not run it through the Arduino.
Arduino Code
The Code
The example code is very simplistic. Setting the step rate too high will cause the motor to miss steps. A proper stepper controller accelerates from a low step rate to a high rate, and then decelerates from the high rate to a low rate. This is because inertia tries to prevent the stepper from turning at first, and then tries to keep the motor turning after the electrical drive has stopped. Acceleration and deceleration help prevent dropping steps and overshoot during starts and stops without limiting the maximum speed. It takes software to build a profile and a controller to apply the profile to the drive, but very high speeds can be had. One particular drive would turn a prism 90 degrees in 30 mS from stop to stop, accelerating to 5000 steps per second and immediately decelerating to a stop. The motor just made a "click" sound at that speed.
#include <Stepper.h>

// change this to fit the number of
// steps per rev for your motor.
const int stepsPerRevolution = 200;

Stepper stepper(stepsPerRevolution, 8, 9, 10, 11);

void setup() {
  // set the speed at 30 rpm:
  stepper.setSpeed(30);
}

void loop() {
  // Turn clockwise one revolution
  stepper.step(stepsPerRevolution);
  delay(500);

  // Turn counterclockwise one revolution
  stepper.step(-stepsPerRevolution);
  delay(500);
}
Steps per Revolution vs. Degrees per Step
If you don't know your steps per revolution, but you do know the degrees per step, you can find the steps per revolution by dividing 360 degrees by the degrees per step. A 1.8° per step motor has:
360° ÷ 1.8 = 200 steps per revolution
If you know the steps per revolution, but need the degrees per step, divide 360° by the steps:
360° ÷ 200 = 1.8° per step
Another Driver
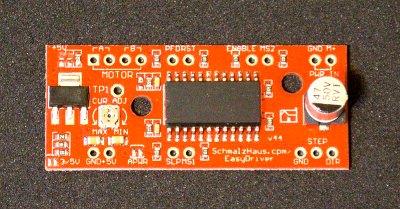
Another way to drive a stepper motor is with an external translator - a chip that decides which phases to toggle and when. The Allegro A3987 is a stepper motor driver with a built-in translator. All you need to do is tell it which direction to go and pulse it once for each step. The A3987 will figure out what to do to make the motor go that direction. It also can microstep, which means it can step even finer than the resolution of the motor. If you have a 400 step per revolution motor, you can get 400, 800, 1600, or 4800 steps per revolution using microstepping.
This particular board is a "bootleg" copy of the one available from Sparkfun. The designer is schmalzhaus.com, but this one says "schmalzhaus.cpm". The board has step and direction inputs, and motor outputs, but also has microstepping selection lines and a few other control lines. One great thing is that it has a built-in regulator. You can select either 5V or 3.3V with a solder jumper, and it will not only run on that, it will output it to power your Arduino as well. The current available depends on the input voltage - the higher the input voltage the lower the available current, due to heating of the voltage regulator. It varies from over 300mA at 9V input to just 25mA at 24V input.
Yet Another Driver
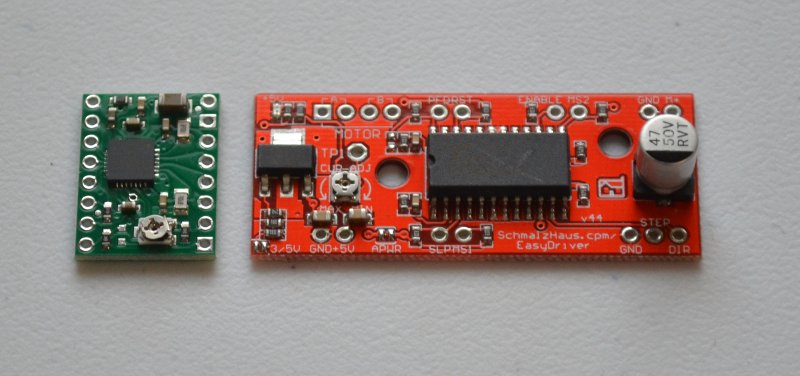
Another driver with an external translator is the Allegro A4988, often used in 3D printers. It is very similar to the A3987, but has lower heating, no regulator, and is 1/3 the size. Driving the NEMA-8 motors above at 0.6 amps, it barely warms up. It can run about an amp per phase before it needs a heatsink. I used this one in the Focuser upgrade project.
A Great Library
Recently I've been doing a project that required turning a wheel by running a motor against its rim. The drive ratio is 15.76:1. At the 30 RPM or so the motor could reliably run with code like that above, it would take 30 seconds to make a revolution. In order to meet the speed requirement, the motor needs to run at 4000 steps per second, which is also about as fast as you can run a stepper with this library on a 16MHz Arduino. You just can't run that fast without accelerating and decelerating the motor.
The AccelStepper Arduino library does just that. You supply a position you want the motor to run to (in steps) and it accelerates to maximum speed, runs there, then decelerates to a stop at the position you specified. I encourage you to look into it if you have need of higher step rates. The documentation includes examples.
Perhaps the best thing about it is that it doesn't "block", meaning you tell it to take a step, and it will if the time is right, but then you can execute other instructions before telling it again to take a step. It does have some blocking methods, which will go from the current position to the target position without returning until the motor is stopped.
A project using both the EasyDriver and the AccelStepper library. And another using an Arduino Nano, A4988, and AccelStepper.