DIY Preamp
This project started out as a test. I wanted just to see if an active preamp could beat a passive one. Along the way, I thought about making each channel a discrete op amp, and even designed it that way. But I priced it out and discovered that it is ultimately cheaper to go with a discrete op amp module.
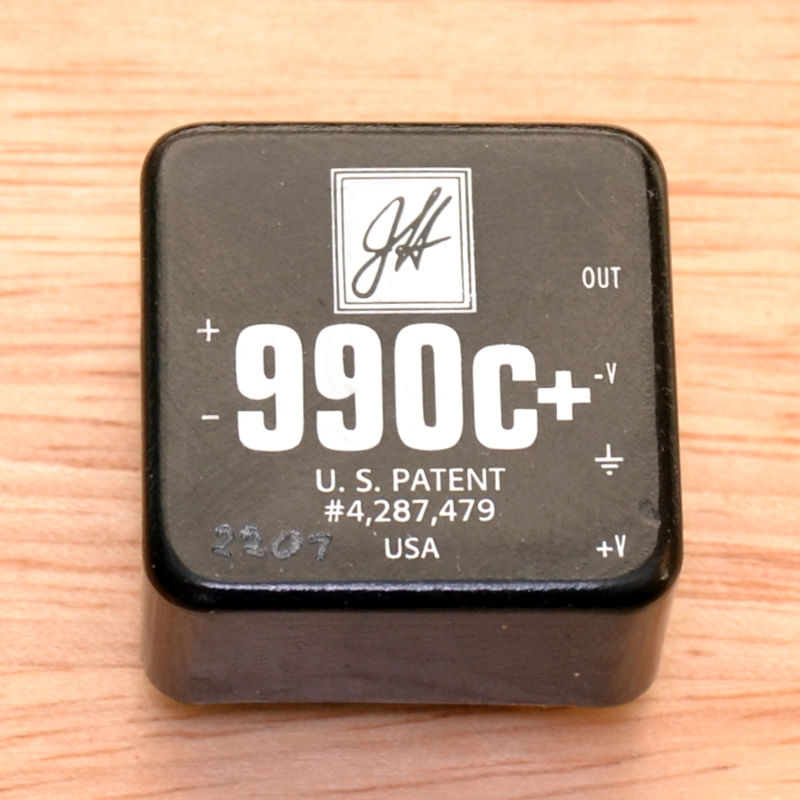
I listened to the examples of drum and guitar riffs recorded with a mic and a mic amp, found on the Hairball Audio Sound Library page. I liked the sound of the 990, so I studied it more and believe the John Hardy 990C+ to be the most advanced version of this Jensen design. These op amps are 1.125" square modules, as used in recording and broadcast equipment. A list of some of these op amps is at the bottom of this page.
Preamp Board
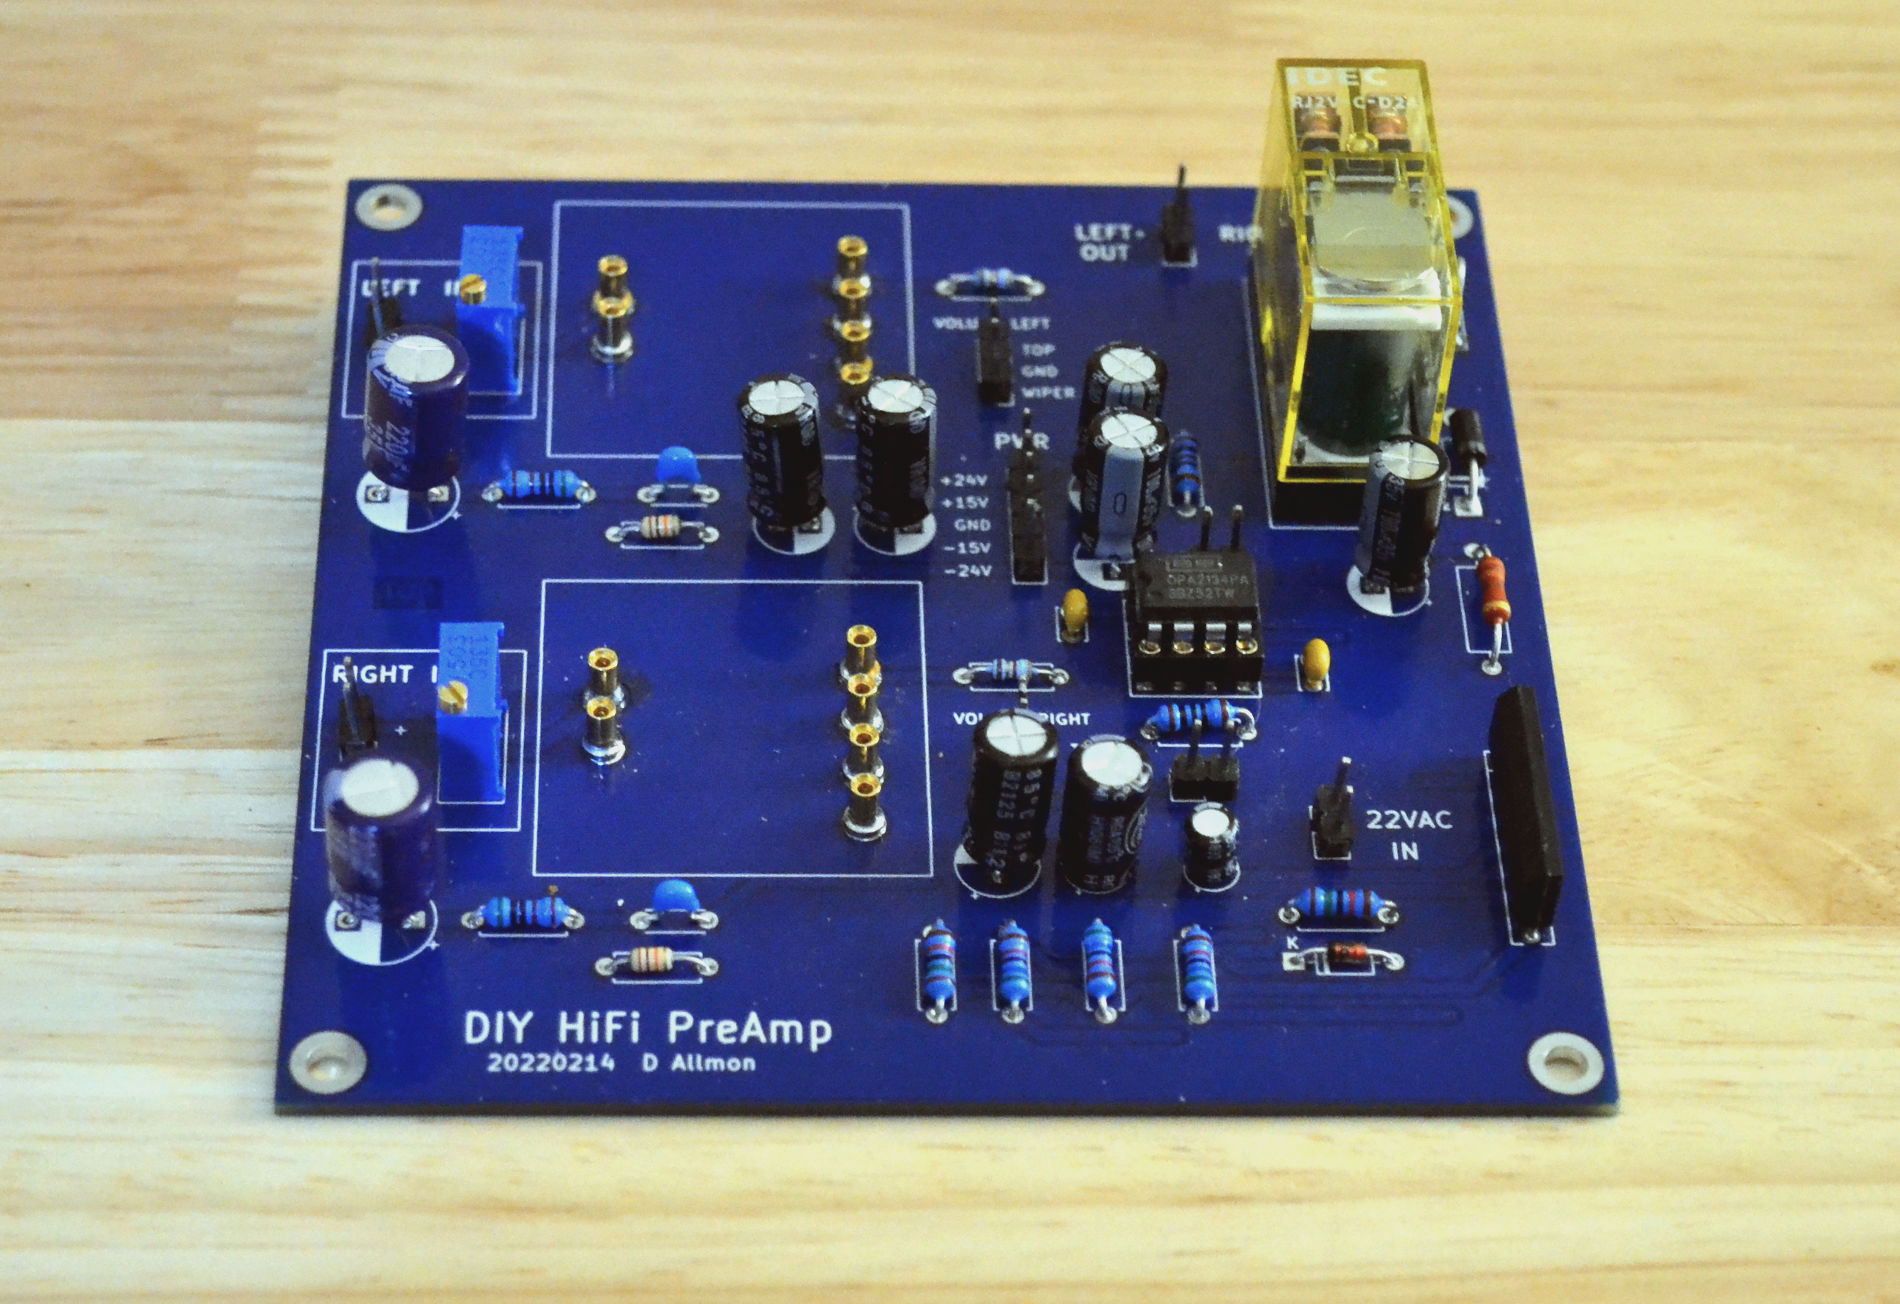
This is the assembled board with main op amps not installed. There are more pictures on the BUILD PAGE.

The schematic of the preamp board. The 990C+ is unity gain stable, but they don't recommend running it that way.
The preamp is a 2-stage design, with a gain stage consisting of a discrete op amp with +9dB gain, which drives the volume control, and an OPA2134 configured as a unity gain follower buffering the volume control. There is a 50k pot on the 990s non-inverting input which provides a decent input impedance and allows me to adjust the overall gain of the circuit to set maximum output and channel matching.
Pulling the OPA2134 and shorting jumpers J9 and J10 converts the preamp into a half-passive design. The 990 drives the volume pot, and the volume pot drives the output.
A relay protects the rest of the system from the preamp. It's really just a speaker protection circuit, using a UPC1237 IC. It provides a delay on power up for the power to stabilize, and will shut the output off immediately when powered off or when a DC offset is seen on the output. When the output is off, the output jacks of the preamp are grounded.
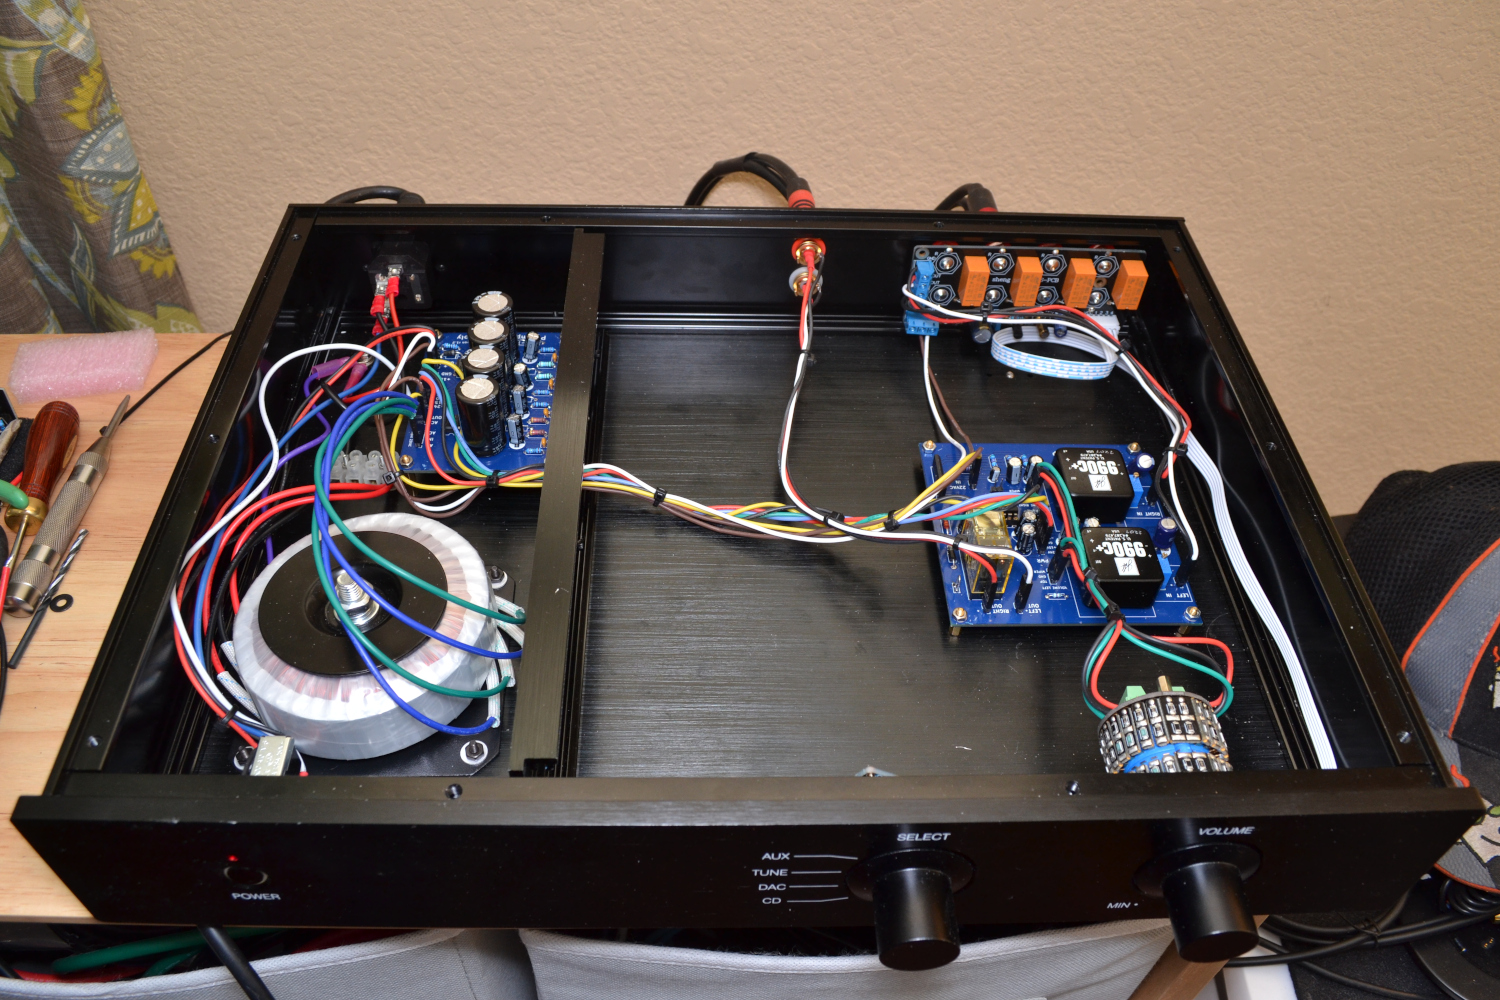
Power Supply
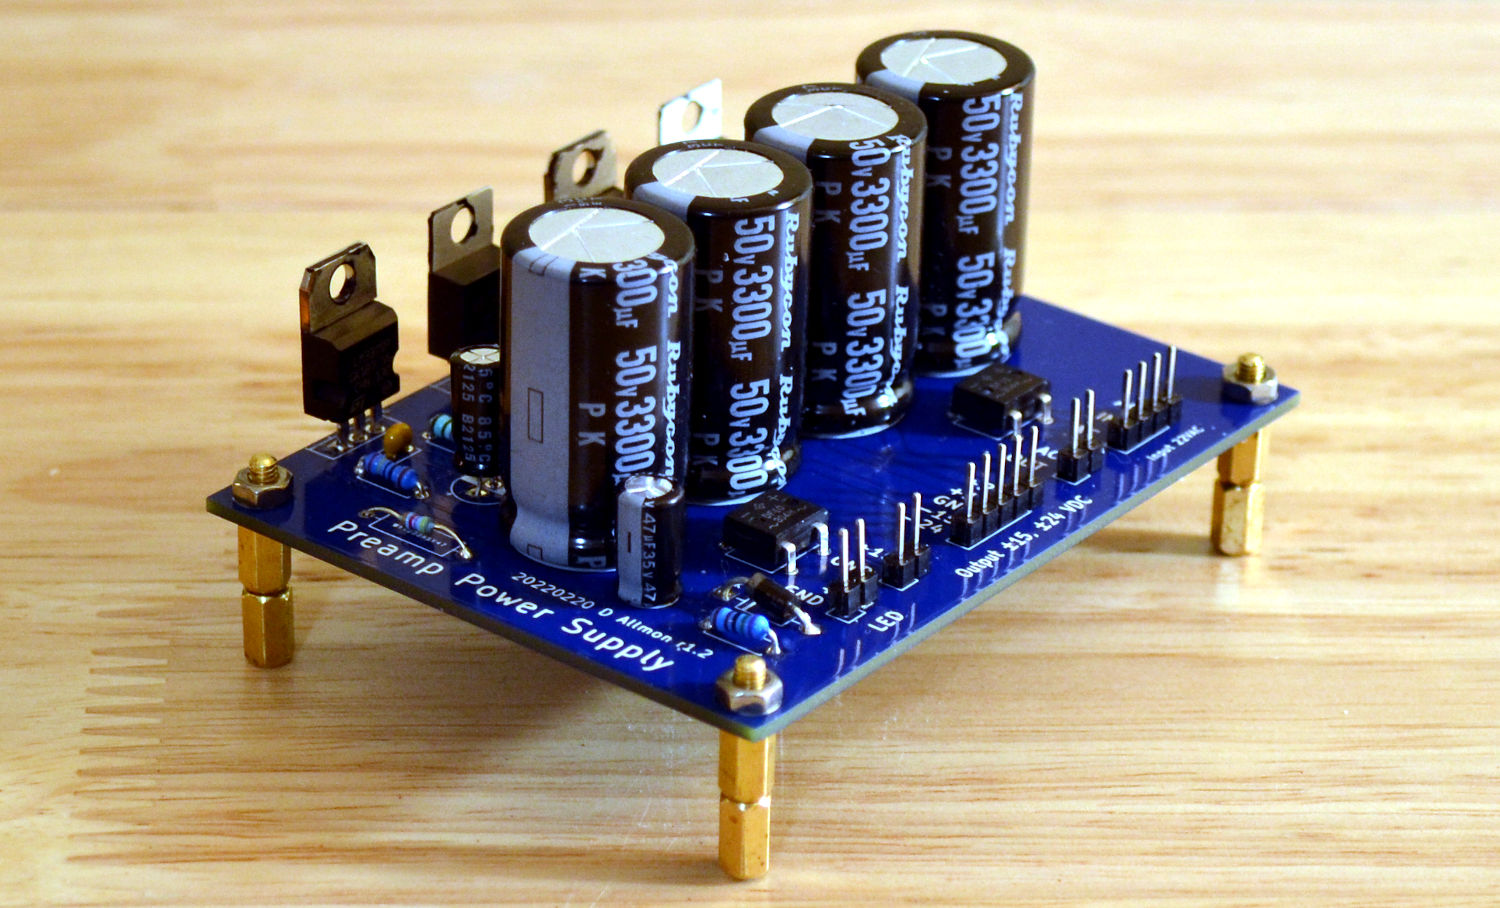

The power supply provides ±24V for the two DOAs and ±15V for the OPA2134. It also sends +15V to the input relay board, and 22VAC to the preamp for the protection circuit. Each main supply is good for just under 1A, with 1.1A total for both. The transformer is an Antek AS-0522. It provides ±31.3VDC with no load after rectification and filtering. I chose the LM317/337 regulators so I could tweak the output voltage if I needed to change op amps.
Enclosure
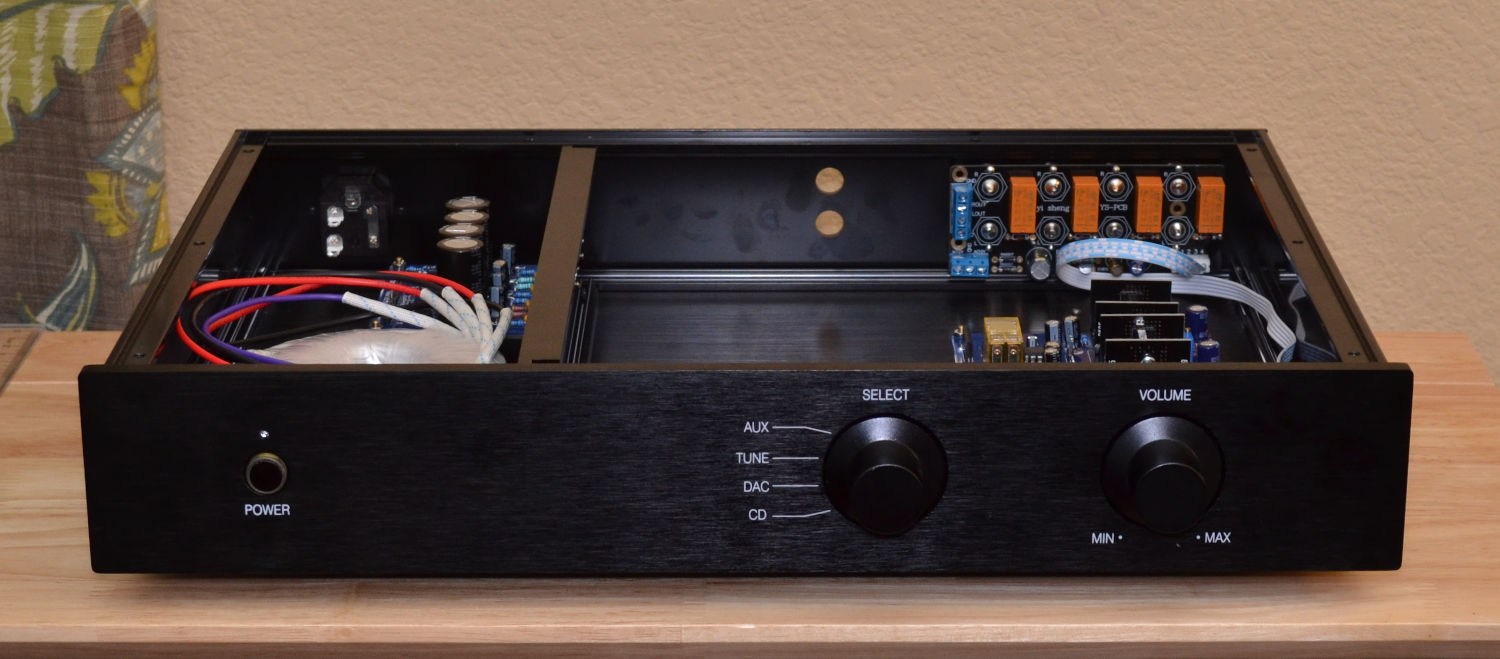
This 2-knob box had all the right holes on the back panel - 8 input and 2 output plus the AC socket - and came with the AC socket, power switch, feet, knobs and screws. Inside it is 300mm D x 410mm W x 60mm H. It comes completely unassembled, in a flat pack, with no documentation, but assembly was easy. All the holes are threaded. The enclosure is much larger than I needed, but not too large to use. I picked up some black aluminum feet to replace the gold aluminum/plastic feet that came with it.
The volume pot is an Allo 10kΩ stepped attenuator made with 0.1% thin film resistors. It's a little rough, but gets smoother with time. The volume and input knobs have no marker on them. I'm going to replace them with better knobs when that becomes my highest priority.
Input switching is accomplished by a board with four relays on it, which mounts on the back panel. The active relay is determined by a 1P4T rotary switch mounted on the front panel. There are LED pads on the switch board, but I would have to drill four holes in the front panel to use them, and I'm not about to drill a hole in that front panel.
The 1A fuse is in the IEC connector on the back panel. The maximum primary current specified for the transformer is 0.44A. It may spike higher on power up. I used 18ga 300V hookup wire for the primary AC wiring.

Build
See the BUILD PAGE for more random pictures.
Testing
I lowered the supply voltage to 23V, because the +24V line was +24.14V. The regulators don't even get warm, but the op amps get hot, even with no input signal. They're class A amps. Each one is dissipating 1.2 watts idling. The SK99s get hot, too. Not the OPA134s, though. Class AB.
To test the amplifier circuit I started with a pair of OPA134 op amps to set the input level, and test the input switching. I used the scope to make sure there wasn't any oscillation or other craziness going on. Then I plugged in the SK99 op amps, and checked again. All was good. I ran some sweeps through to see if the response was flat in the limited range in which I can test, and a 10Hz sine wave signal to see that the protection circuit wouldn't trip on it. Only then did I plug in the 990C+ op amps.
The only audio test I could do, since I don't have legit audio test equipment, was to listen. I hooked up an A-B switch and did listening tests against the passive preamp, after setting the outputs to be equal. I listened to the new preamp with the 990C+, SK99, and OPA134, both full active and half-passive, and every combination sounds different. The SK99 is a bit bass heavy for my taste. The OPA134 has even response, but lacks the crisp details. I prefer the 990C+, in half-passive mode, because it has more punch and sounds more lively than the passive at the same volume. The imaging is better. Adding the OPA2134 makes the sound a little weak, like there is less contrast. That could be the load it has to drive, which might be kind of funky. Anyway, the 990C+s perform very well. I'm happy with them. They bring the HiFi up another notch.
This turned out to be a mostly easy project. The only hard part was drilling the holes in 2 planes for the power supply, and getting everything to line up. And that was made easier by doing it in two steps, and leaving the caps off of the power supply board until all the holes were drilled.
The enclosure was an absolute joy to work with, even if it was pricey ($132 including shipping). Still, that isn't a bad price for what you get, and I couldn't do it myself. I'll do the same if I ever have another project like this.
The star of the show has to be the 990C+ op amp. The sound is really tight and clean.
I did ultimately get a set of knobs that have markers on them.
Stay tuned for the next version, which cleans up a couple of bad choices made on this one. Version 5 removes the protection and the relay from the preamp board, adds 2 more discrete opamps as buffers, doing away with the OPA2134, and provides each of the 4 discrete opamps with DC servo feedback to eliminate offset.
Some Discrete OpAmps
Here are the Discrete OpAmps of which I am aware. If you know of others, please be so kind as to provide a link to me from the contact page.
Here are the KiCAD projects for the 2 boards: