Telescope Power Box
Skip to the end: Power Box 5
I changed the telescope control computer from a Mac Mini to a Raspberry Pi 4B. With the Pi, I added another wall wart to the already large collection. There is one for the telescope, one for the camera, one for the filter wheel, one for the focuser, and one for the flat fielding box. Now one more for the Pi. It takes more than one outlet strip to fit them all. I went with the Pi to simplify, but to really simplify I needed to get rid of as many wall warts as I could. To that end, I bought a 12V 11.5A power brick that can handle all of the various devices at the same time.
The Pi wants 5V @ 3A, so a DC-DC converter is hung off of the 12V line and converts that to 5V @ 4A. Both power supplies are regulated, because the camera and the Pi need well regulated power. The telescope, focuser, filter wheel and flat box will run on about anything 12V-ish. I picked up the power supplies and the mating mini-DIN at Mouser. The 12V supply would have been less expensive if it hadn't needed to be regulated.
The box is a Context Engineering 6" x 4" x 1.5" aluminum box that I found at Fry's Electronics years ago. A Twin Industries 8000-45 4" x 5" perfboard fits perfectly in the card slots. With the perfboard's 0.037" holes, the 5V converter is a snug fit, but it works.
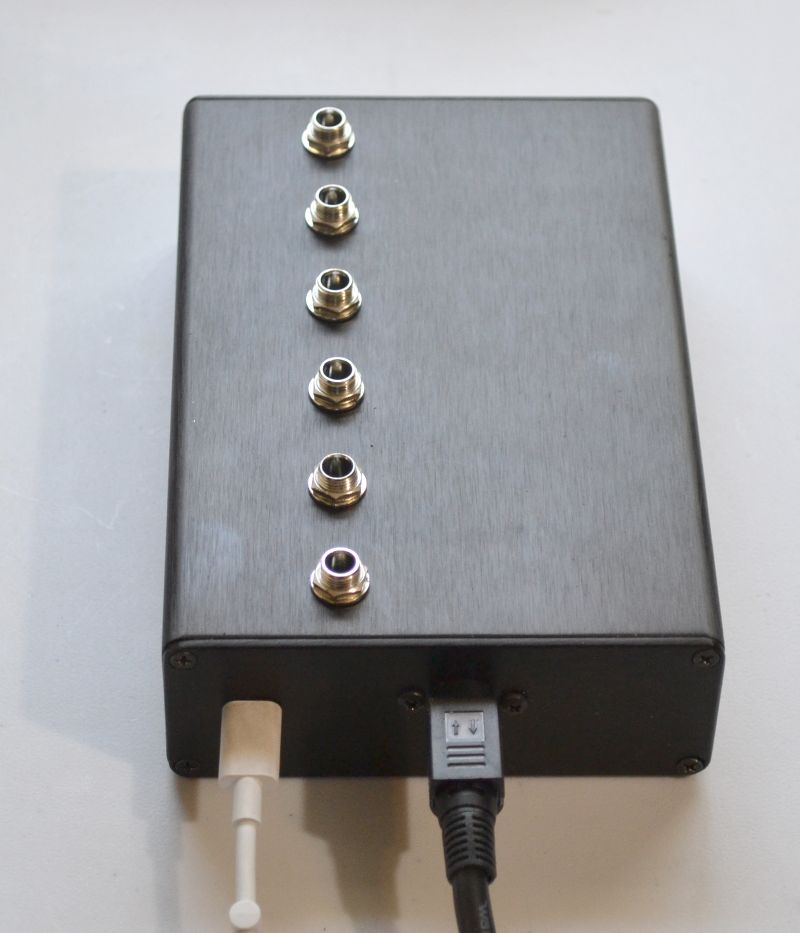
There isn't really a schematic, since everything is just +12V to +12V, ground to ground. I used bus wire and red/black primary wire for all of the internal wiring. The external wiring is round white 22ga. cord, except the Pi output, which is USB-C, and the camera and scope outputs which are 18 gauge twisted pair. The outputs are on 2.5mm x 5.5mm jacks. The other ends of the 12V power cables have the appropriate size (2.1mm x 5.5mm or 2.5mm x 5.5mm) connector. The 5V output uses a USB-C connector to support the USB-C cable required by the Pi 4B. I used a USB-C breakout board from Amazon to accommodate the USB-C cable. It is a knockoff of the Sparkfun USB-C breakout board. They came in pairs, which was attractive because I had no idea how easy or hard it would be, or how many tries it would take to do the USB-C. In the end it was just the two pins - 5V and ground. There are 1µF ceramic capacitors and 1000µF electrolytics for each of the six outputs.
I initially tried it with locking barrel connectors found on ebay. They turned out to be extremely flaky, like the center conductor was too small. It wasn't, but the connectors still had a sloppy fit. I occasionally spent time wiggling and reseating connectors before giving up and getting some decent Switchcraft connectors. I replaced the connectors, and reinstalled the box. No problems since, but time will tell.
Key Parts List:
| Item | Description | Price |
|---|---|---|
| GST160A12R7B | Meanwell 12V 11.5A power supply | 55.11 |
| MDS20A05 | Meanwell 5V 4A DC-DC converter | 38.15 |
| KPJXPM4SS | Kycon locking mini-din socket | 3.21 |
| 712AH | Switchcraft 2.5mm x 5.5mm DC barrel socket (6 pcs) | 20.22 |
| 8000-45 | Twin Industries PTH perfboard | 11.80 |
| 4006H-6B | Context split-body aluminum enclosure 6.0" L x 4.13 W x 1.5622" H | 23.95 |
| - | Flashtree USB-C female breakout 6-pins 2pcs | 10.99 |
| Total | 163.43 |
USB-C power connection
Fortunately the Raspberry Pi takes all of the power it needs, so only the Vbus and Gnd connections are required. The voltage at the output of the DC-DC converter is 5.002V under load. With a high quality 6 foot cable the voltage at the GPIO header on the Pi is 4.74V which is below the 4.75V minimum, and it doesn't reliably boot. With a high quality 3 foot cable it is 4.88V. A 5A rated 18-inch cable, as well as a 3A 6-inch cable yields 4.96V at the header. Since I put the power box on the scope with the RPi, it seems the 6-inch cable is right for the job.
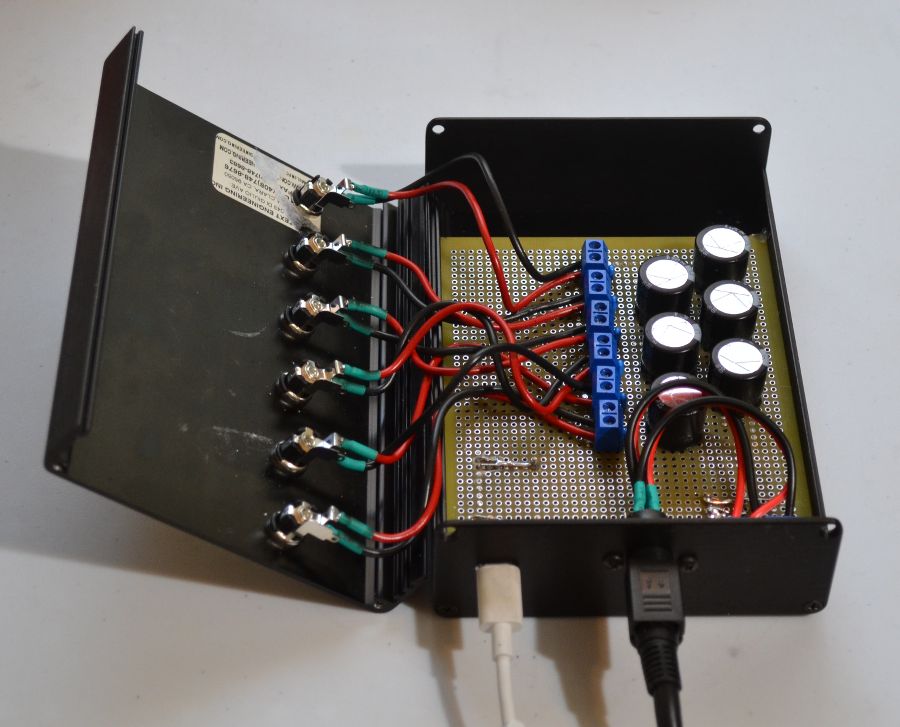
The wiring between the board and the lid uses screw terminals, so I don't have to un-solder all of those wires to remove the lid. You can't see the USB-C board - it's behind the panel. The DC to DC converter is also hidden, being upside down under the board. The top of the converter rests on the inside of the bottom of the case, to help cool the converter. It gets a little warm when the Pi is working hard. The perfboard is 1 inch shorter than the case, so to keep it from sliding when plugging in the USB-C cable, I put a couple of dabs of hot glue in the slots.
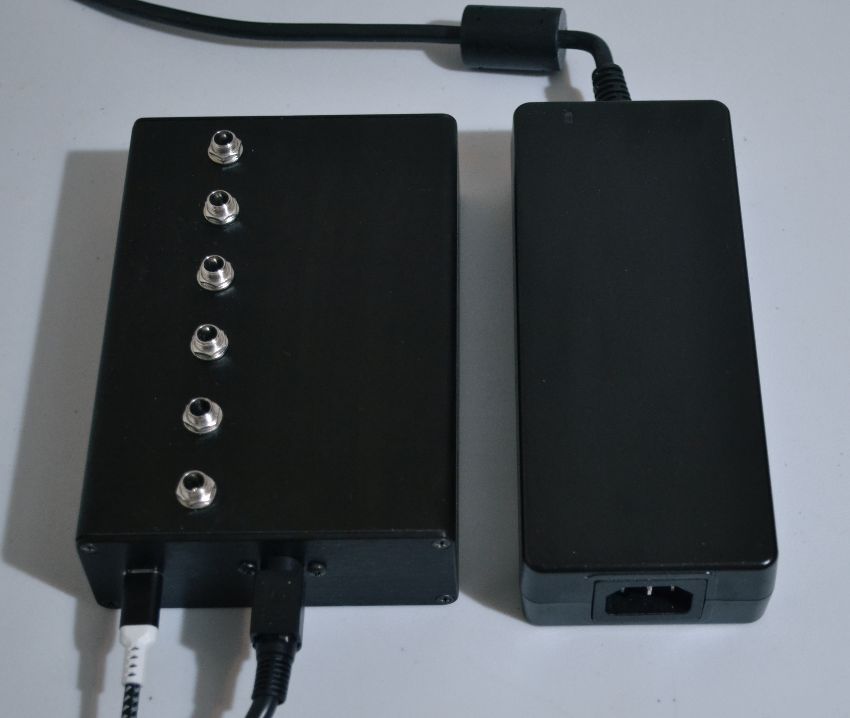
The box supplies the power to all devices without the brick getting very warm. The biggest draw is when the camera is cooling and the scope is slewing, and that is about 7.25A peak. Here you can see the relative sizes of the brick and the box. The box is 6" long and the brick about 1/2" longer. The brick's output cable is 3 feet long.
I have seen and thought a lot about cable management, but until I hooked this thing up I didn't realize that the power supply wires are the biggest offenders on the scope. So I've traded two outlet strips and six wall-warts for this box and power brick, and my wiring mess has been cut at least by half. It helps that, since I had to make the cables, I could make them the right length for each device.